
First Person View Racing Drone
At the beginning of 2020, I saw a Drone Racing League race on ESPN. The absolute speed and precision of the drones flying around the racetrack was awe-inspiring. From that moment, I knew I had to get involved in drone racing. After some quick research, I decided that I wanted to build my own drone instead of purchasing a pre-built Quad. Once that decision was made, an insane amount of further research was needed.
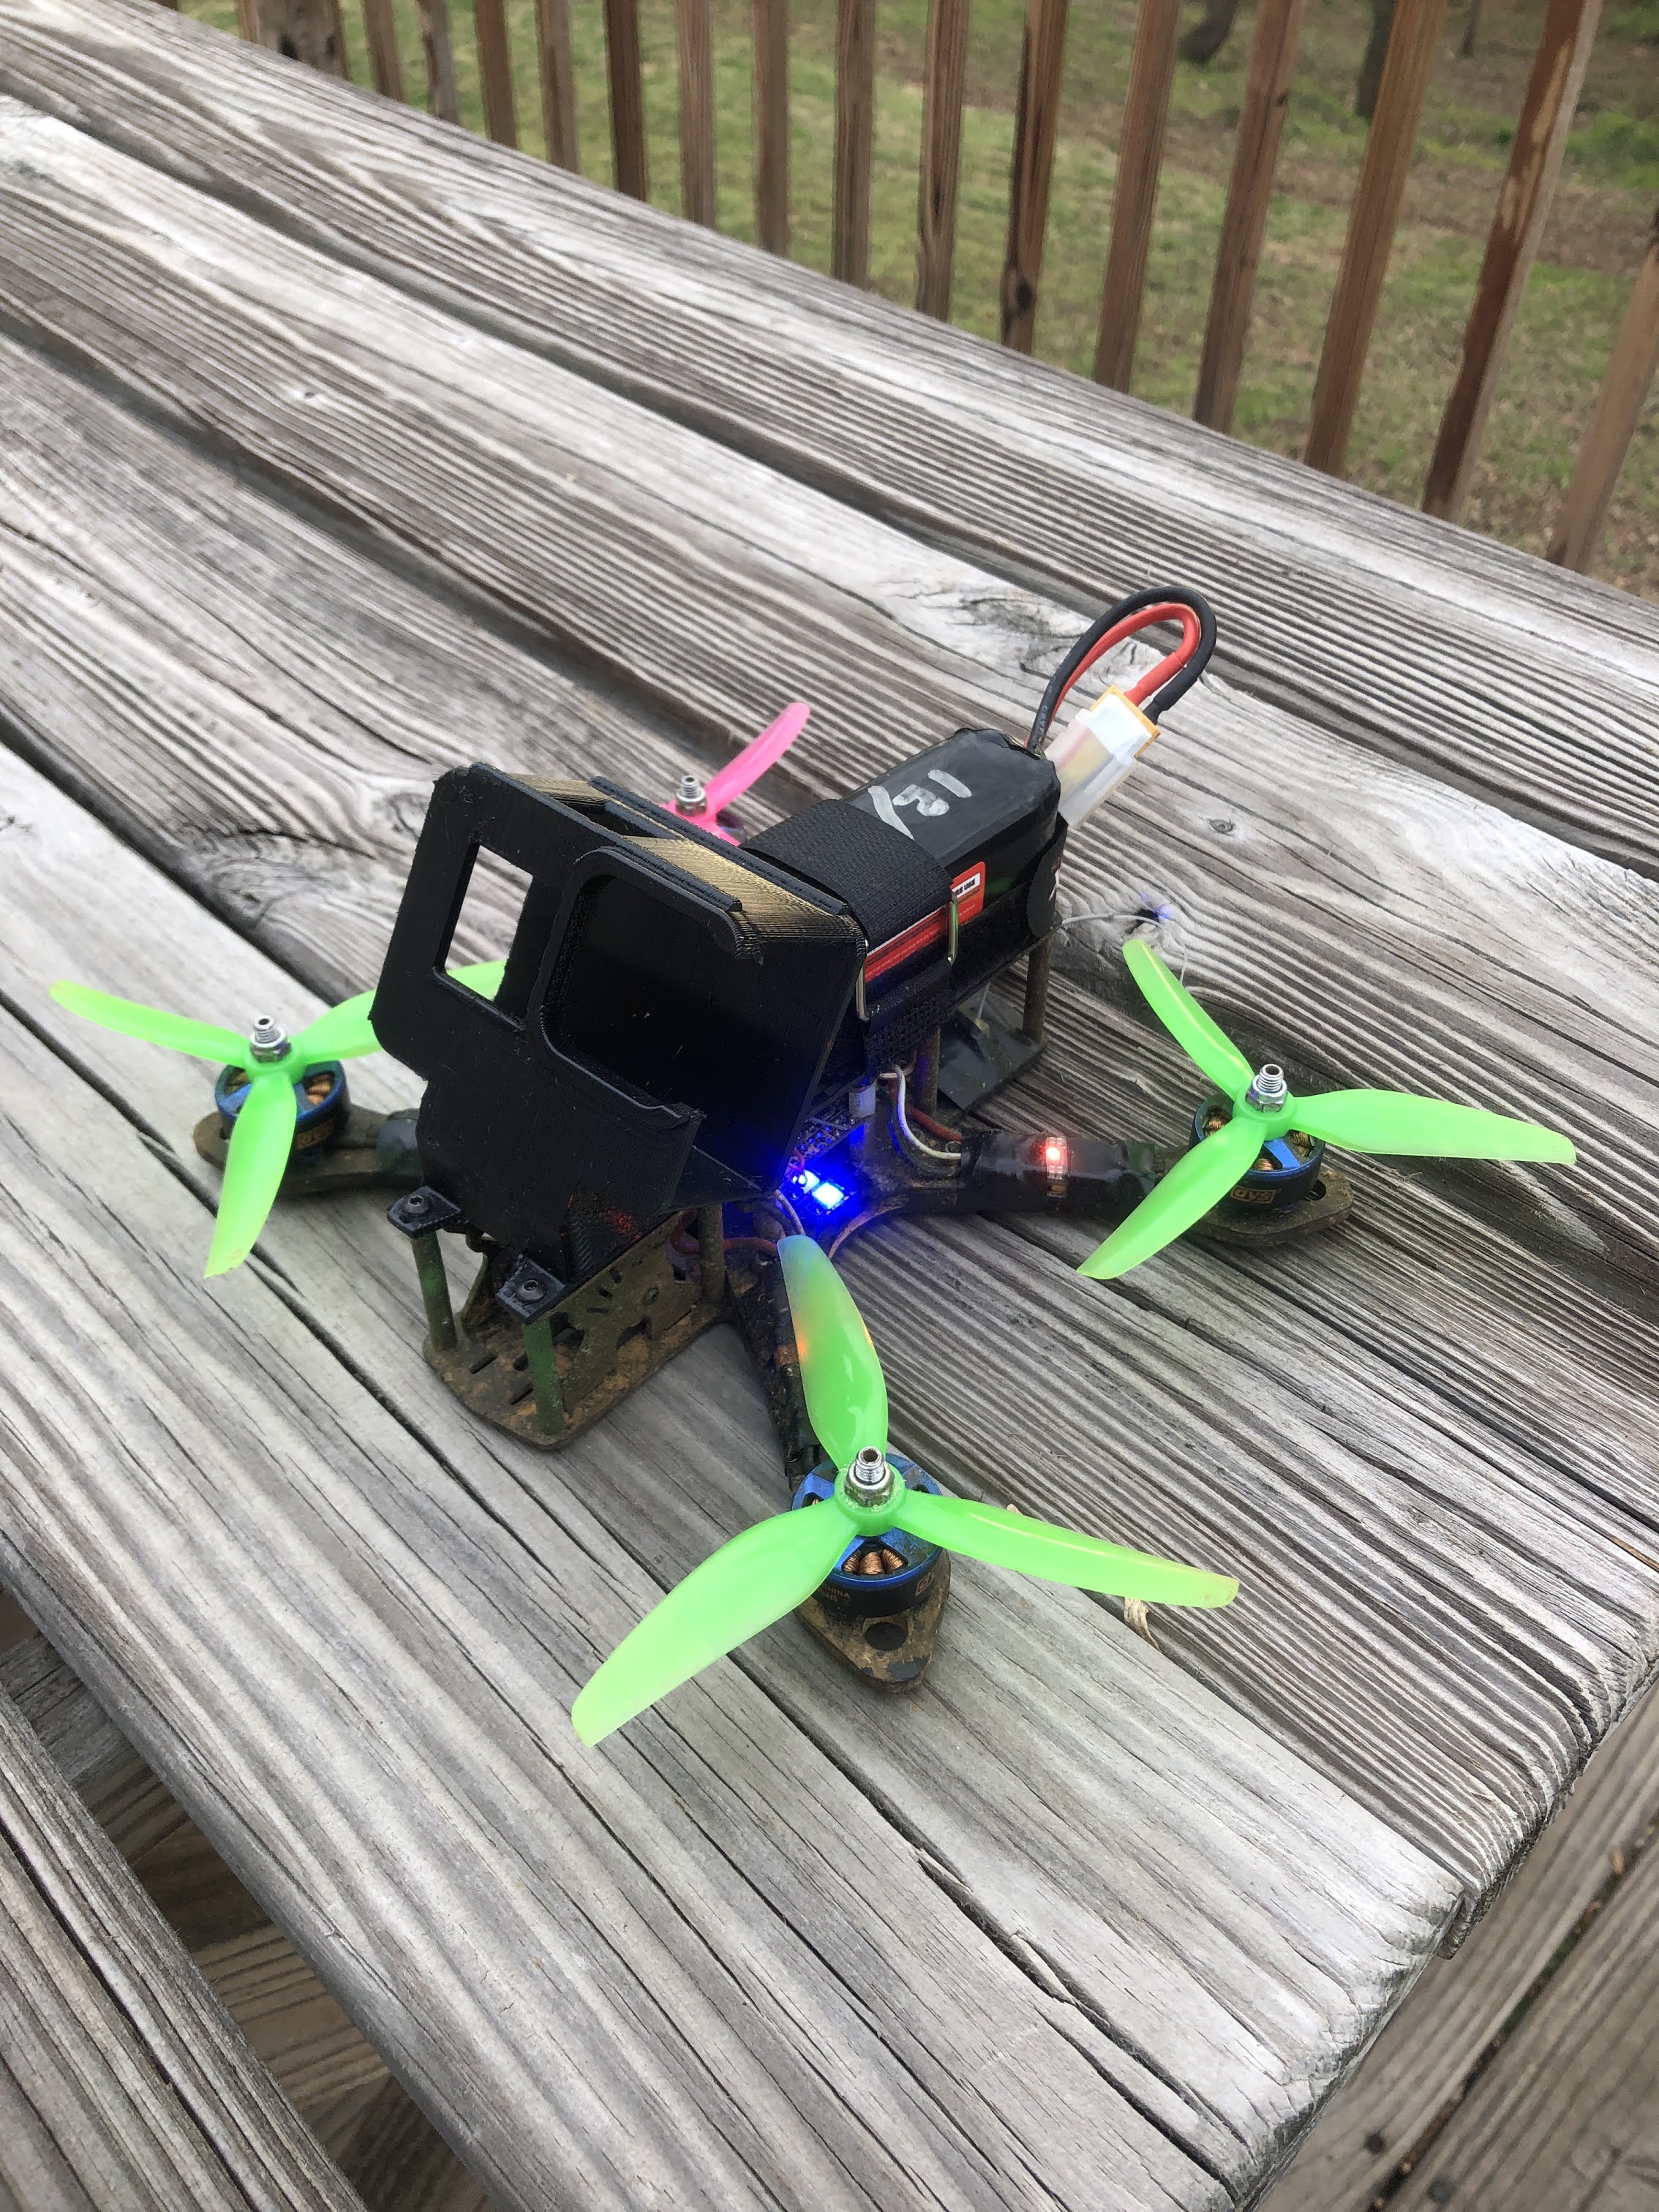
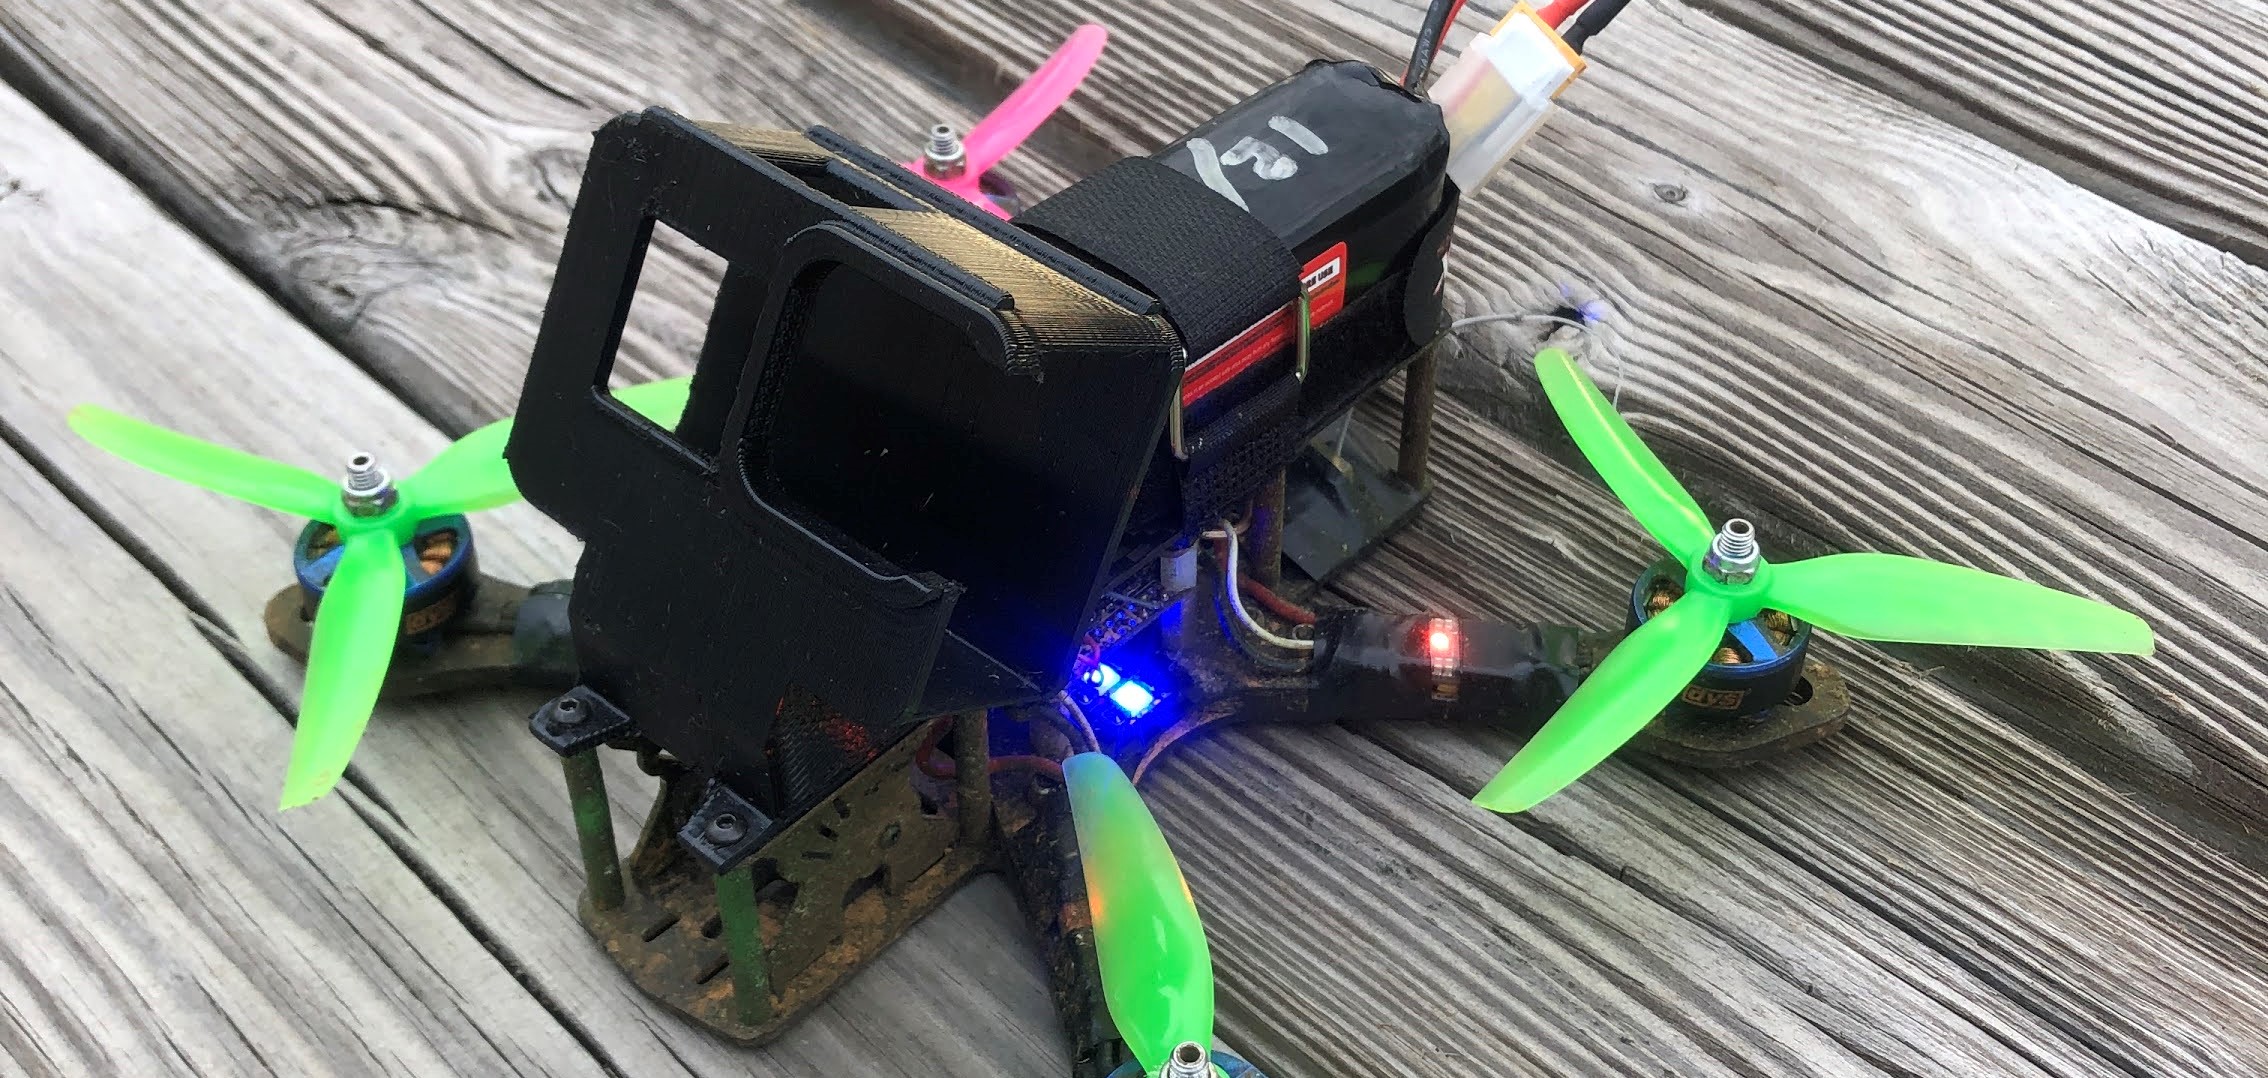
The biggest initial challenge was learning about the components that go in a racing drone and ensuring that each of the components, manufactured by different companies, would all work together. The body of the drone is composed of a carbon fiber frame that is strong and durable to survive high speed crashes. The flight controller is the brains of the drone. A built-in gyro provides information on the drone’s orientation. The FPV camera mounted in the front of the drone captures the video footage and sends it to the flight controller, where an on-screen display, which provides information to the pilot, is added to the images. These images are sent to the video transmitter board. This board sends the video via lollipop antenna to the pilot and transmits it over radio waves, with a set frequency and power determined by the pilot. The drone also contains a radio receiver that connects with the pilot’s radio controller. The final components for the drone are brushless motors, motor controllers (ESC’s), propellers, a buzzer, and LED lights.
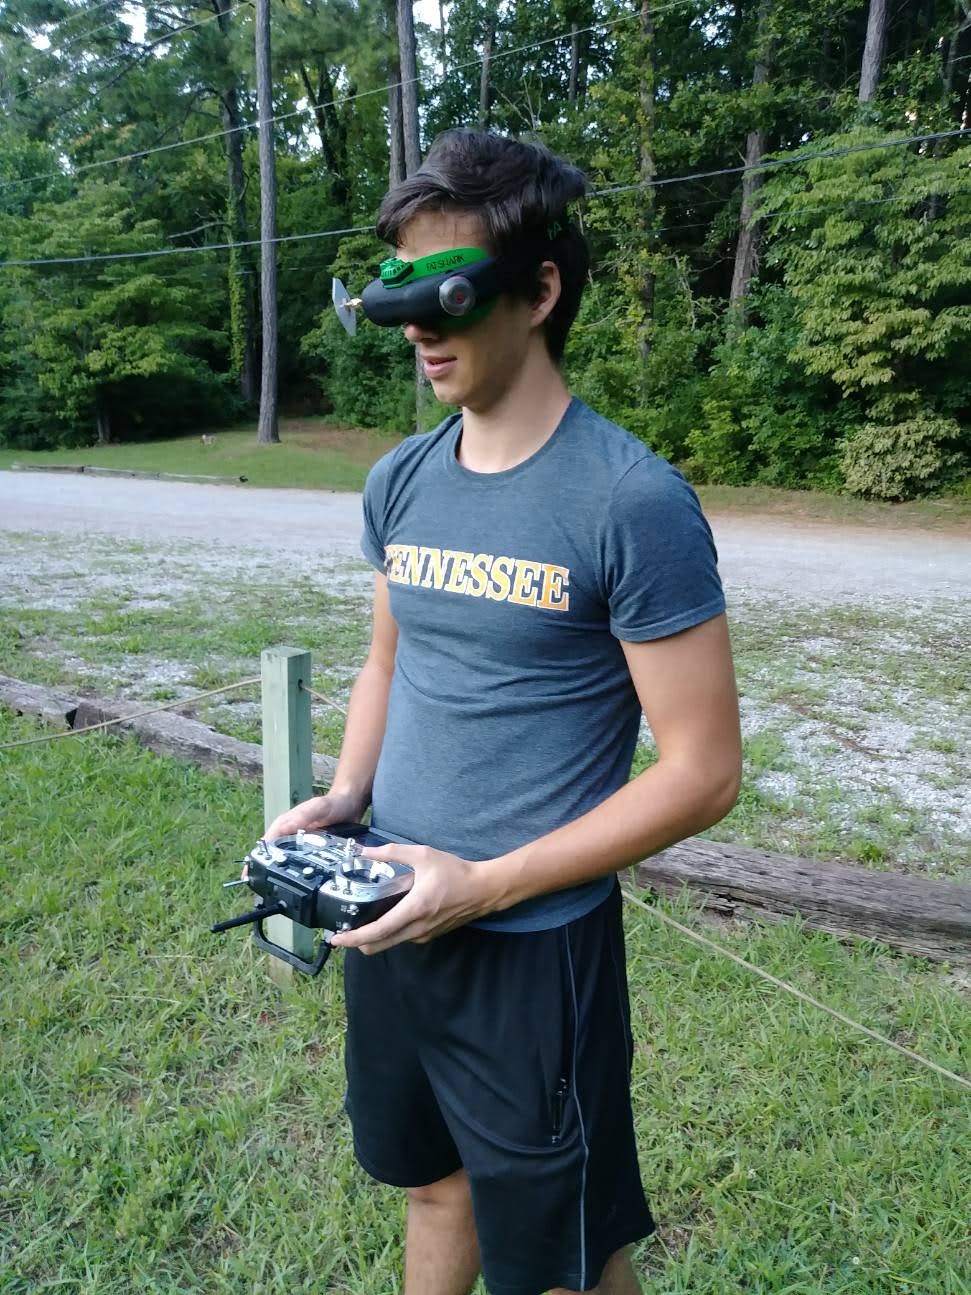
I chose to build a five-inch drone (meaning the propellers are five inches in diameter) powered by a four-cell battery (14.8V) because most races are in the five-inch class. Many drone racers are switching to six-cell batteries, but the lower voltage of the four-cell battery allowed me to get motors with a higher Kv rating (basically motors with more power) and I was certain that the electronics on the drone could handle a four-cell battery. So, the drone is safer without much loss in performance. The pilot flies the drone by receiving the live video feed from the drone to a pair of goggles. Similar to virtual reality, it is like the pilot is sitting in the “cockpit” of the drone. I fly with Fatshark Attitude V5 goggles with a rapid-fire radio module.
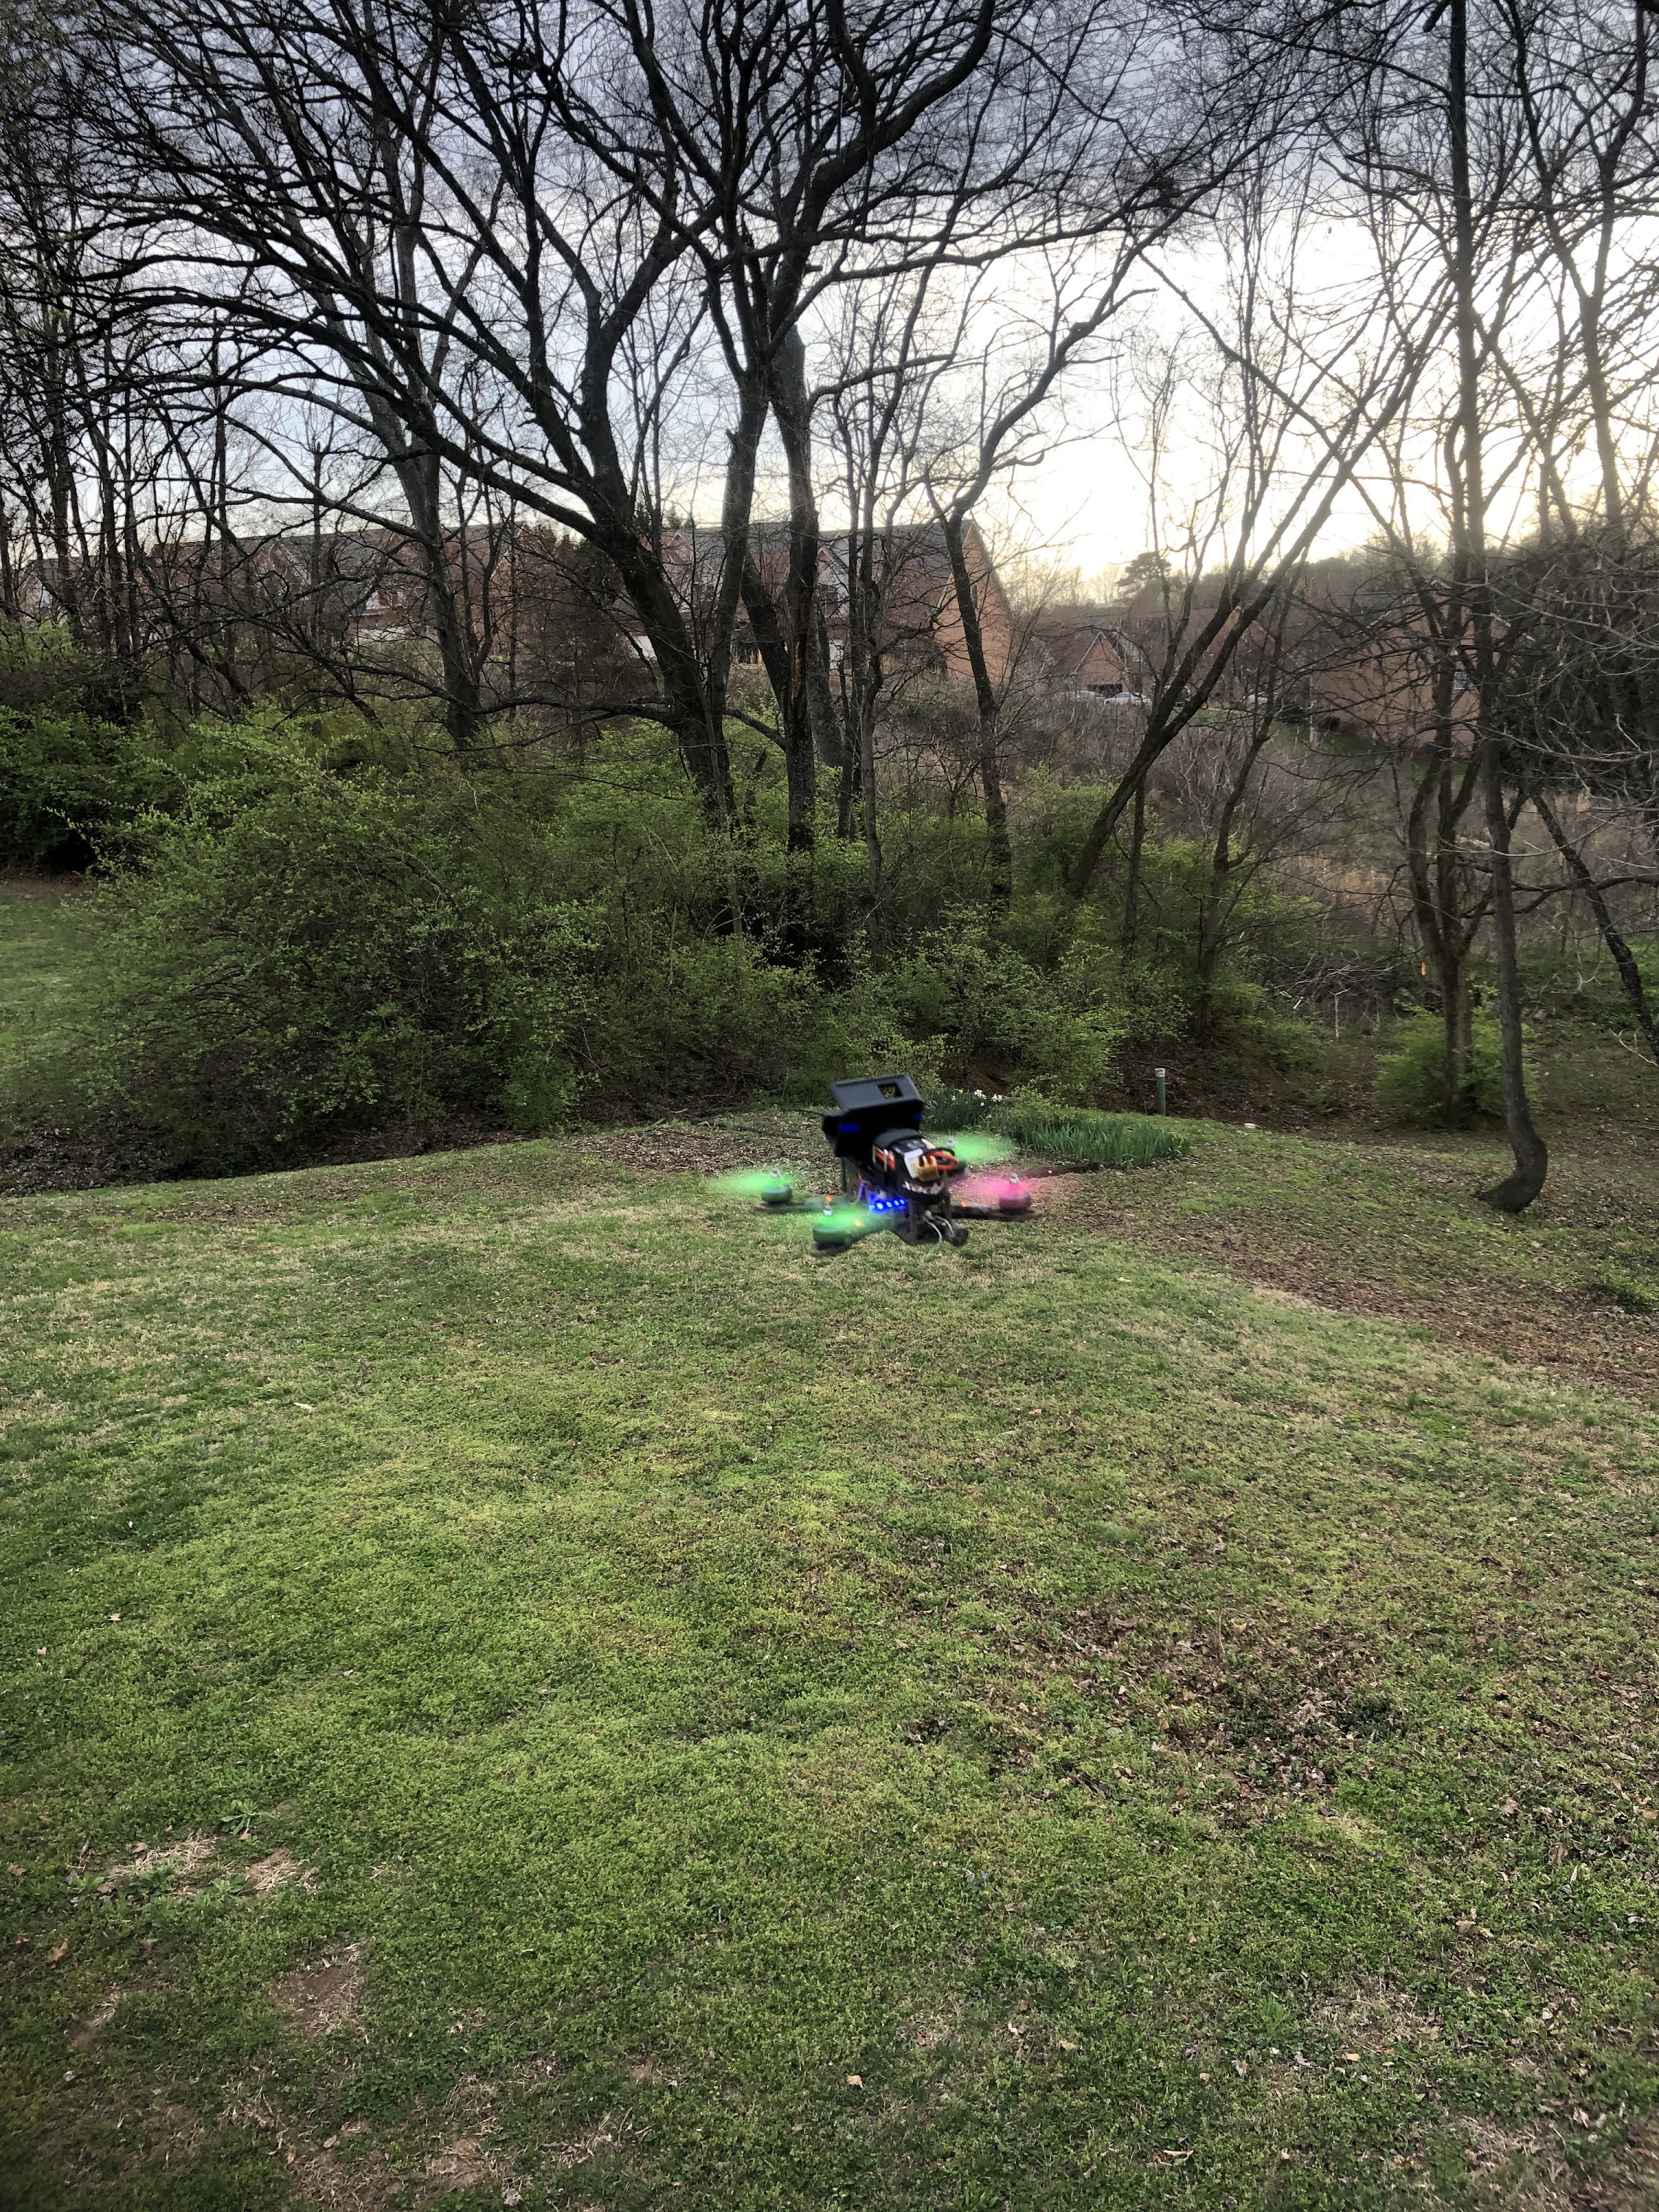
Physically building the drone was an absolute blast. All the electrical components had to be soldered together and the confined space of the drone and tiny solder pads made for a fun challenge. Once all the components were mounted and wired together, software set up was the last step before flying. Most race drones are flown using BetaFlight, which has an easy-to-use user interface to set up and program drones. BetaFlight automatically recognizes the board and ports available, and the pilot simply tells what components are on each UART pin. A lot of effort went into the total firmware set up of the drone, however. The direction of the ESC’s had to be set in a different software, BLHeli. The VTX had to be set up to transmit the right frequencies and powers. Connection to the radio and the function of each command channel had to be set as well. I had quite a bit of trouble setting up the radio controller and connecting to the drone for the first time but eventually found out that the radio was faulty and was able to find a solution to that problem. When I finally got the drone set up for the first flight, finally took it out to the neighborhood field, it flew like a dream. I had practiced for months in the simulator and when I first flew for real, I had no trouble.
I have learned a ton working with the drone and am continually moving forward. BetaFlight has advanced PID control and filter systems. When I first started I just flew the stock settings and it flew great but not perfect. One problem was in sharp corners or accelerations I would get bad “prop wash” where the drone gets shaky flying in its own rough air. I made my own PID settings so that the drone would fly as well as its physical components would allow. An onboard micro SD card records data from the drone. Spectrographic analysis of the gyro data revealed how the filters needed to be set up to remove motor noise from the gyro control loop and examining the target point and actual position helped me to tune the PID’s. Now the drone flies spectacularly, and I no longer have a problem with prop wash.
Flying the drone is a unique experience. Being able to zip through the air at high speeds making precise sharp turns is exhilarating. And exploring the space in a new way, flying high above the ground, is just really cool. I want to share this experience with others, so I 3D printed a mount to attach a GoPro on the drone and to capture high-definition footage from the drone. I have also obtained a Part 107 certification for commercial flight of small, unmanned aircraft systems so I can fly and capture footage responsibly, safely, and legally.
Gallery